Brutus Monroe has such great stamp designs but
that isn't all, the cardstock is beautiful!

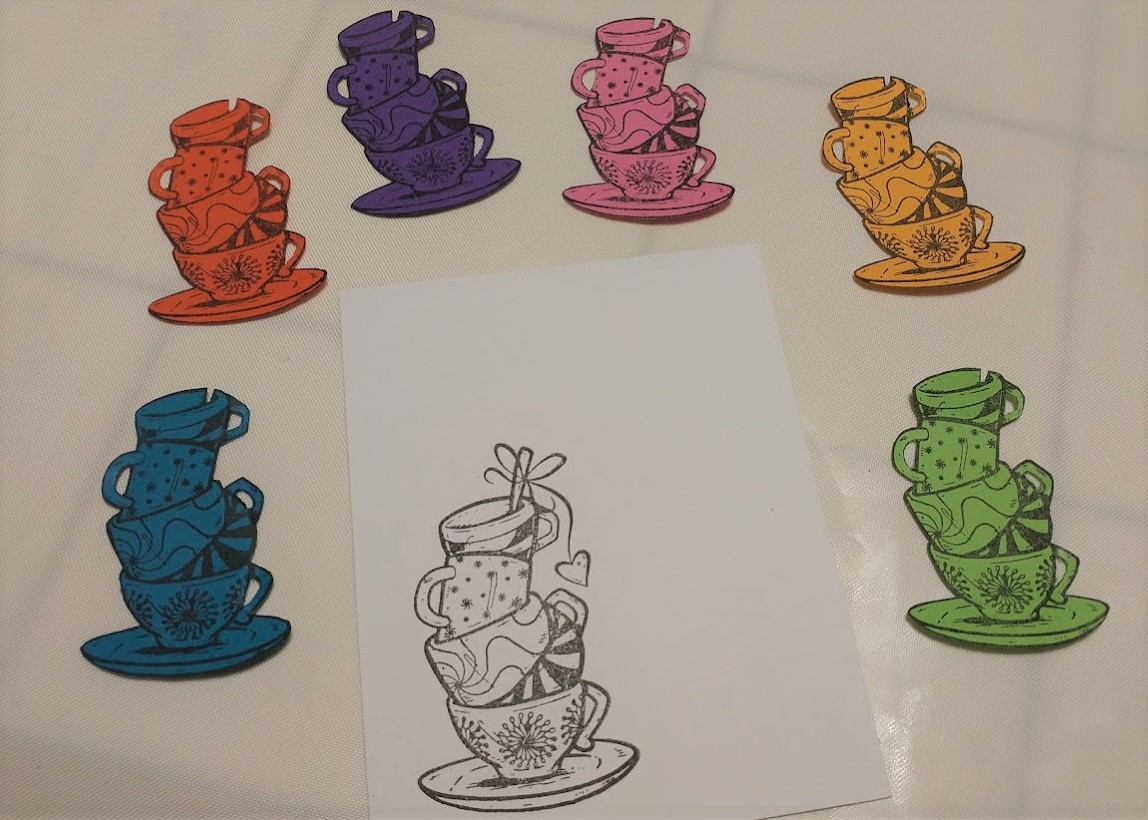
Starting with Tea Time Stamp Set and 6 colors of B.M. cardstock

I stamped the stacked teacups on all 6 colors plus white using
I cut each image

not just that, I cut each cup from each color then restacked them all

Again I stamped the stacked cups, this time 6 times on plain white cardstock.
Using Brutus Monroe Craft Glue, I reassembled each and cut them out.

These funky stacked circles seemed like the perfect match for the stacked teacups.

I also decided no stack of teacups should be without a doilie. I used
the Leah - Mandala Die from Brutus Monroe and thick white cardstock.

After choosing which cup stack I was using, I strategically cut each
color, the largest cut from a 5.25x5.25 black square to next the piece back
together in.

With so many colors in the image, I thought the sentiment should be kept simple
but needed a little bit extra, embossing time! I used the Brutus Monroe Embossing Ink
along with Raven Embossing Powder

This sparkley white ribbon seems to hold it all together plus
a few drops of Nuvo Glitter Drops and a bit
of Clear Nuvo to make the straw stand out!


